Quick Start – micro : bit Python
Software Preparation
Access the Online Editor
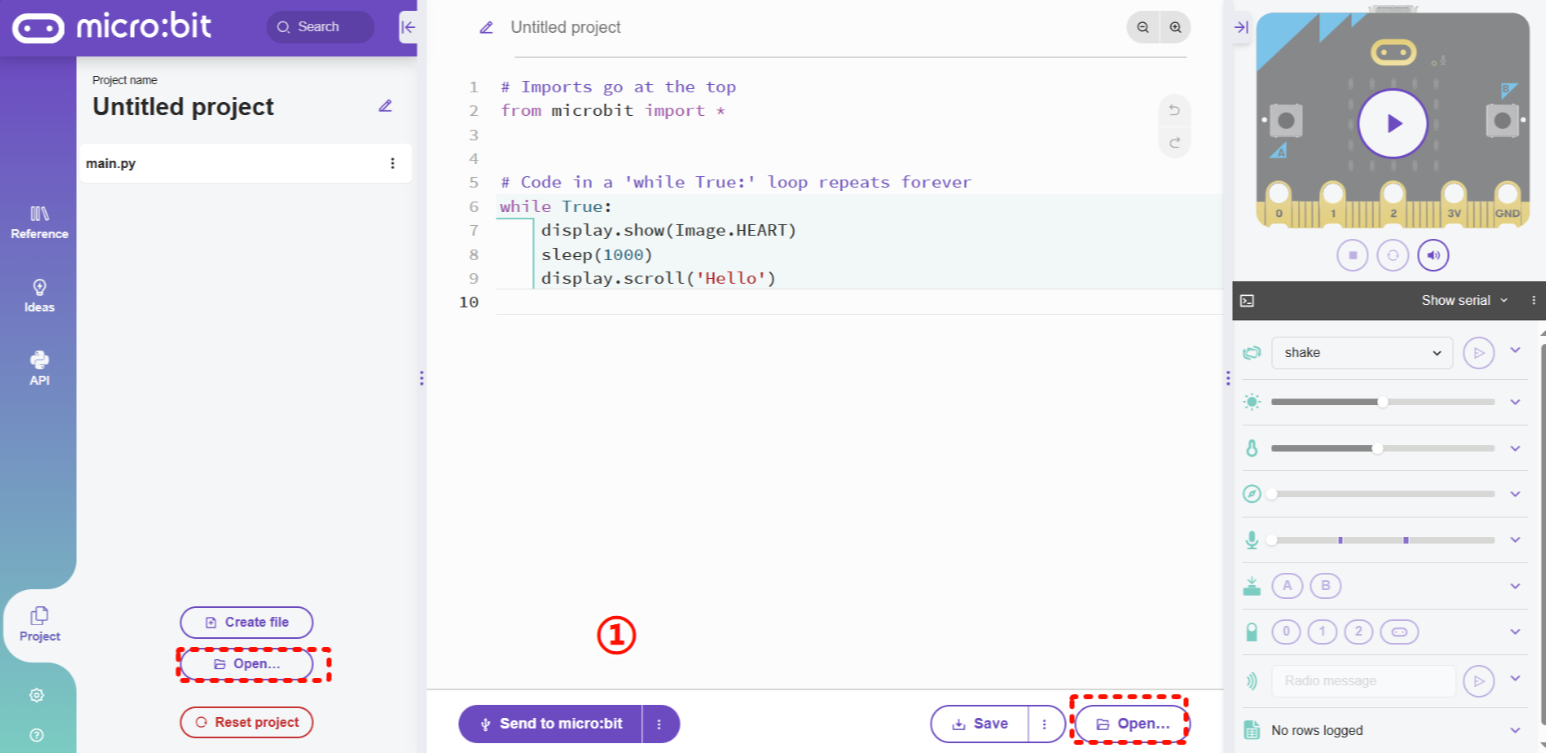
Click the link micro:bit Python Editor to enter the online editor. When entering for the first time, the interface looks like this:
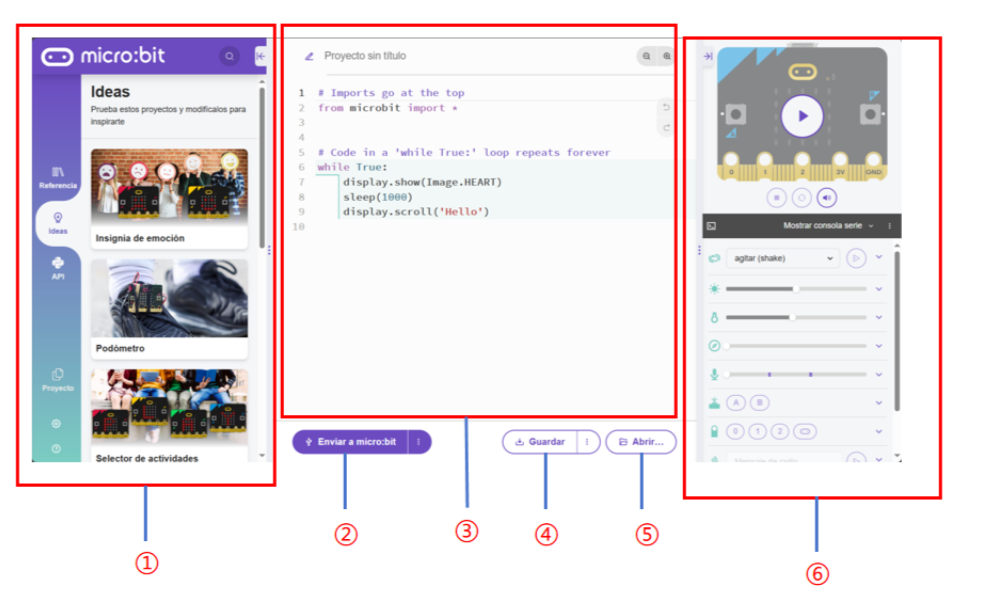
NO. |
Component |
Description |
|---|---|---|
① |
Function Panel |
Project management |
② |
Send Code |
Send scripts to the connected micro:bit |
③ |
Code Editor |
Edit user code |
④ |
Save |
Save the project as a .hex file to your computer |
⑤ |
Open |
Open a local file |
⑥ |
Status Display |
Show the current status of the micro:bit |
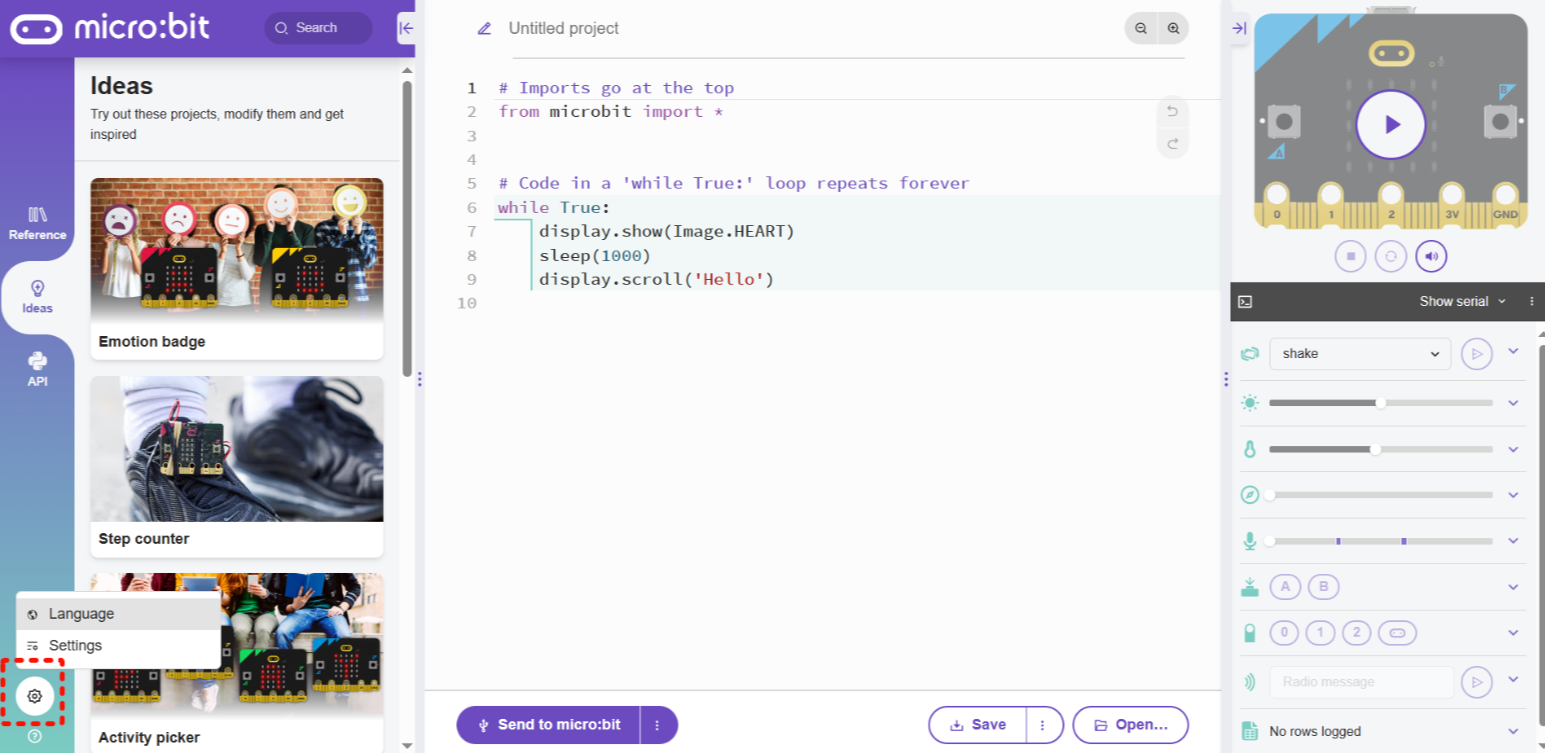
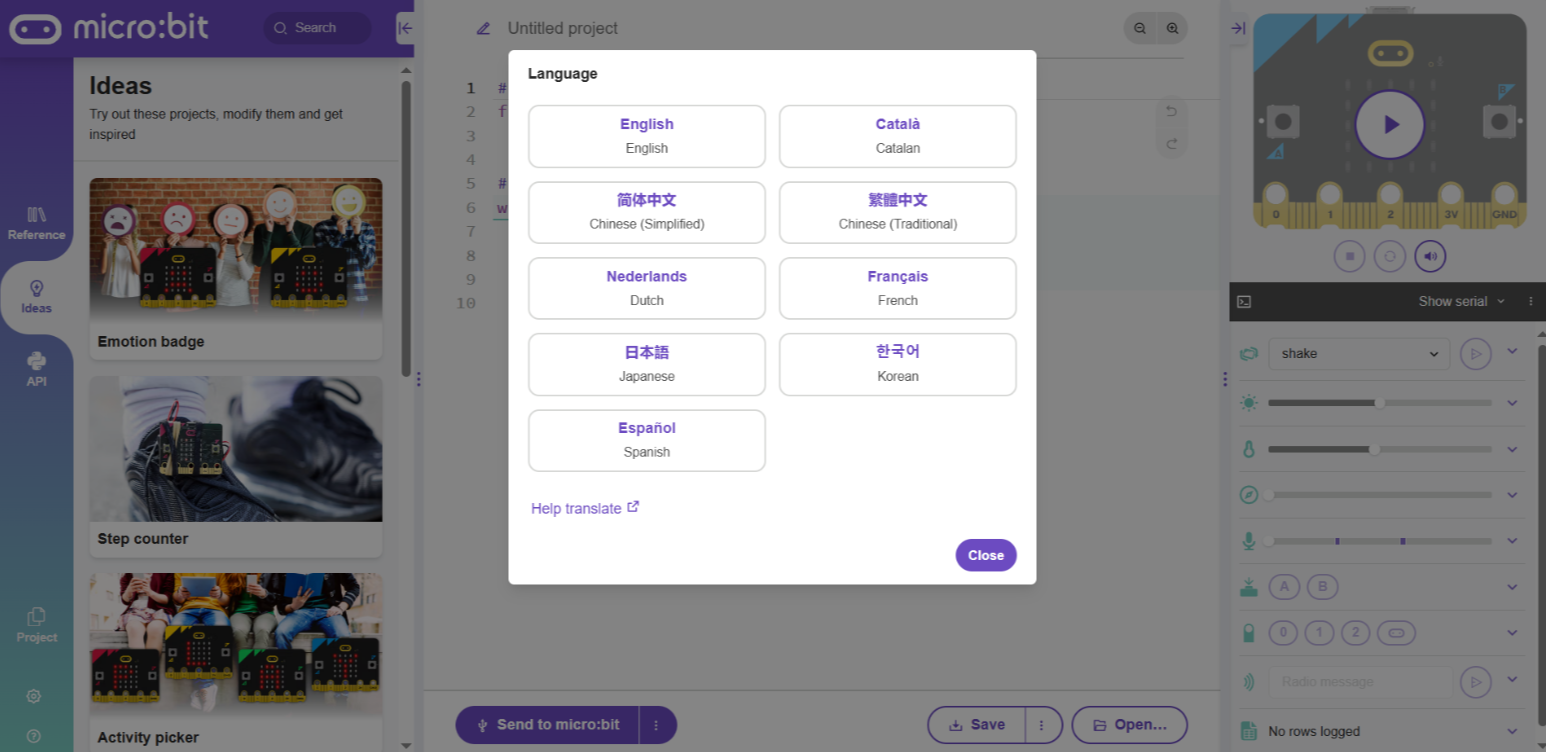
Language Switching
Step 1: Click the gear icon in the lower-left corner and select the Language button.
Step 2: In the pop-up window, select your desired language.
Note: It is recommended to use micro:bit V2.0 or above. Lower versions have insufficient memory and may not function properly.
Obtain the Driver Files
This document provides the Python driver files for download from GitHub and Gitee.
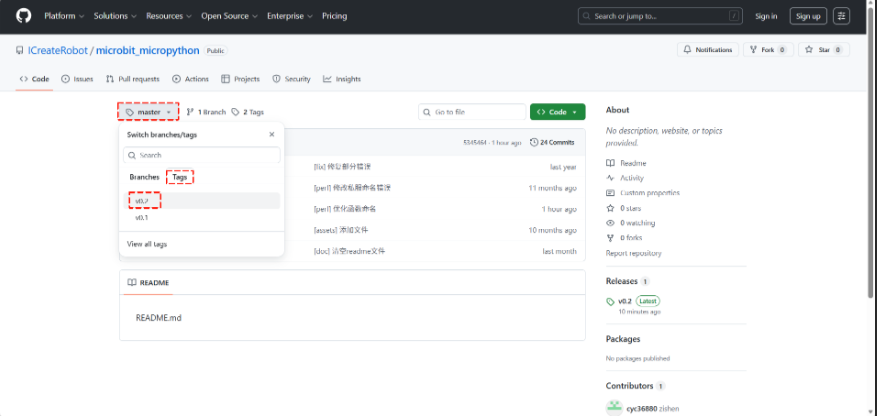
Obtain from GitHub
Step 1: Go to GitHub.
Step 2: Click the master branch, then select the latest version from the Tags on the right.
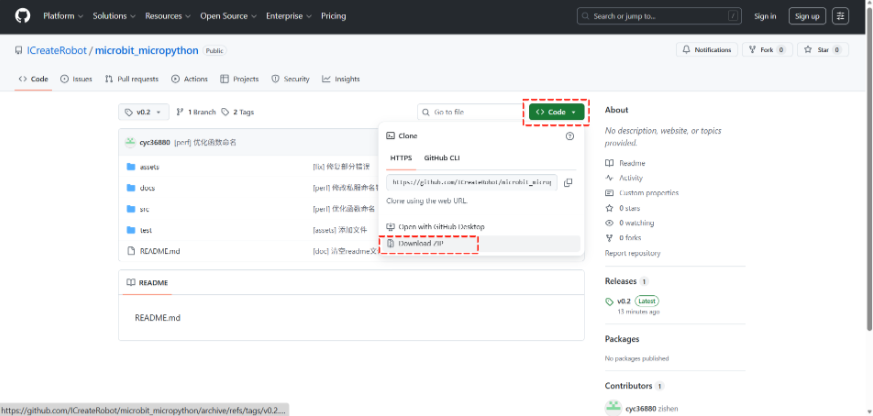
Step 3: Click Code and select Download ZIP to download the library package.
Obtain from Gitee
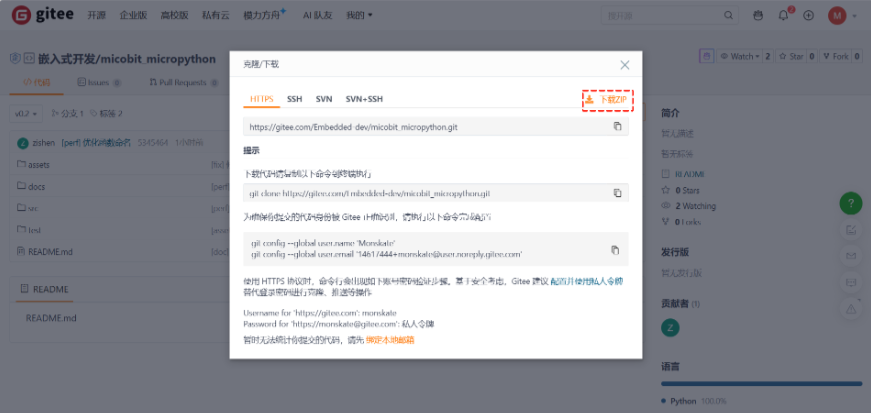
Step 1: Go to Gitee.
Step 2: Click the master branch, then select the latest version from the标签on the right.

Step 3: Click克隆/下载and select下载ZIPto download the library package.
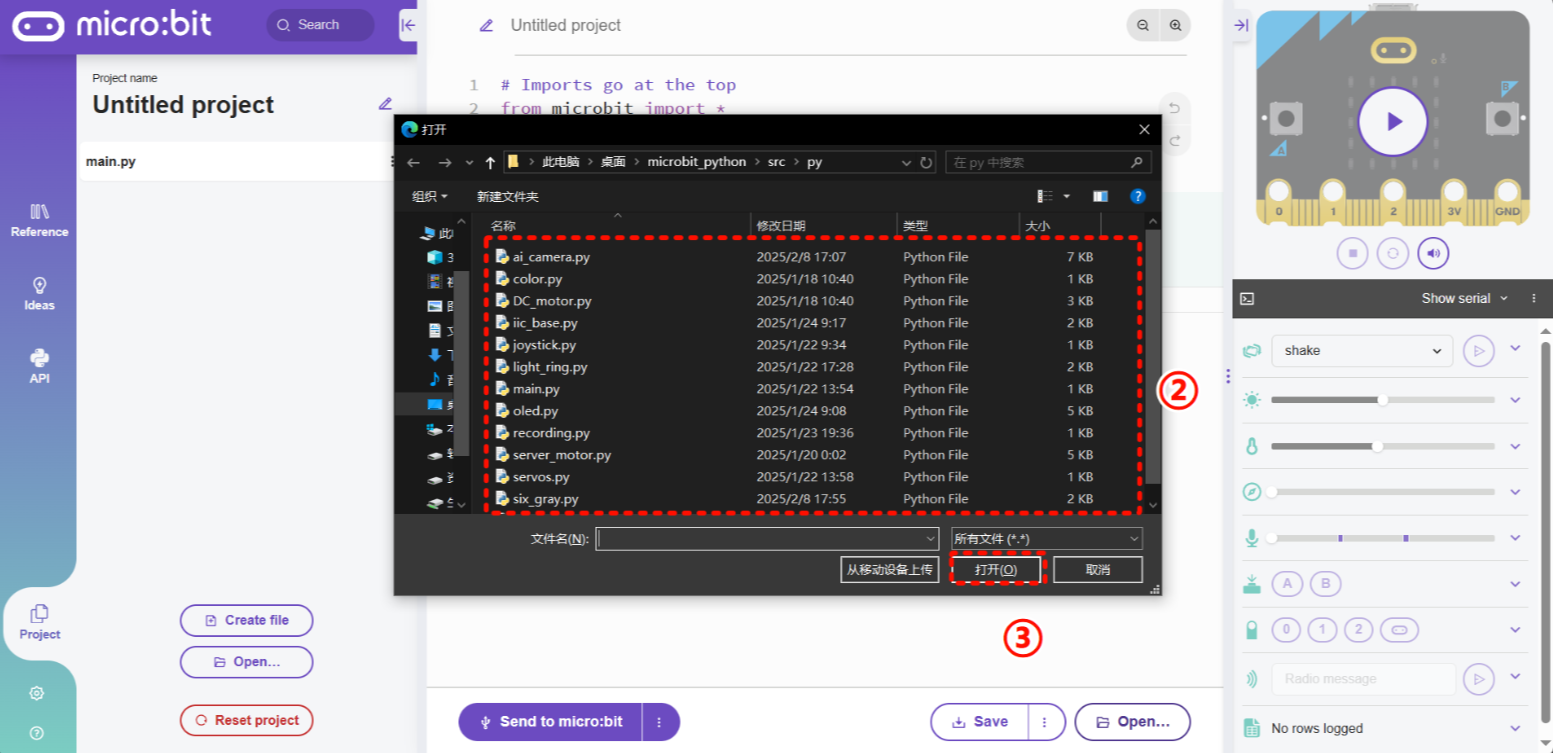
Import the Files
Extract the downloaded ZIP file and locate the required Python files.
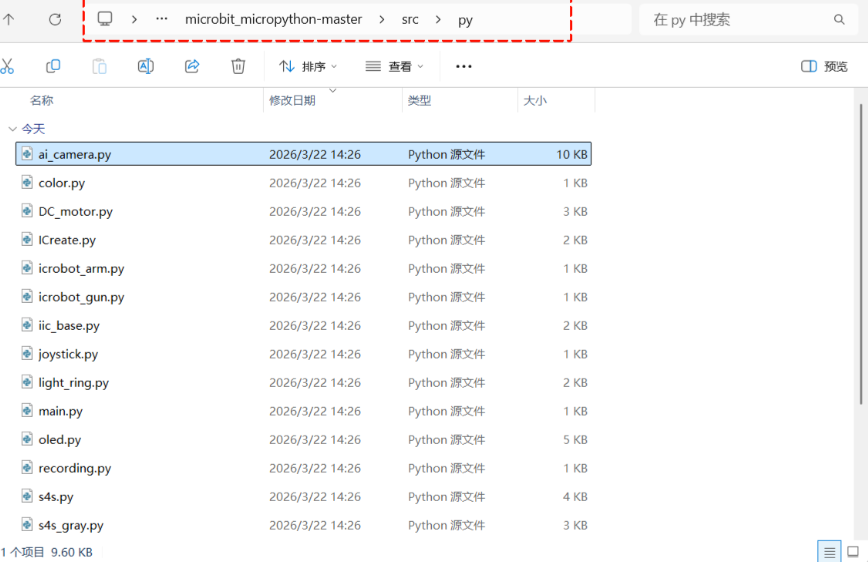
When using the libraries, you should at least import the following files:
color.py、iic_base.py、ai_camera.py
Step 1: Click the Open button (lower-left or lower-right).
Step 2: Select the file you want to import and click Open.
Note: To select multiple files, hold the Ctrl key and click the files with the mouse.
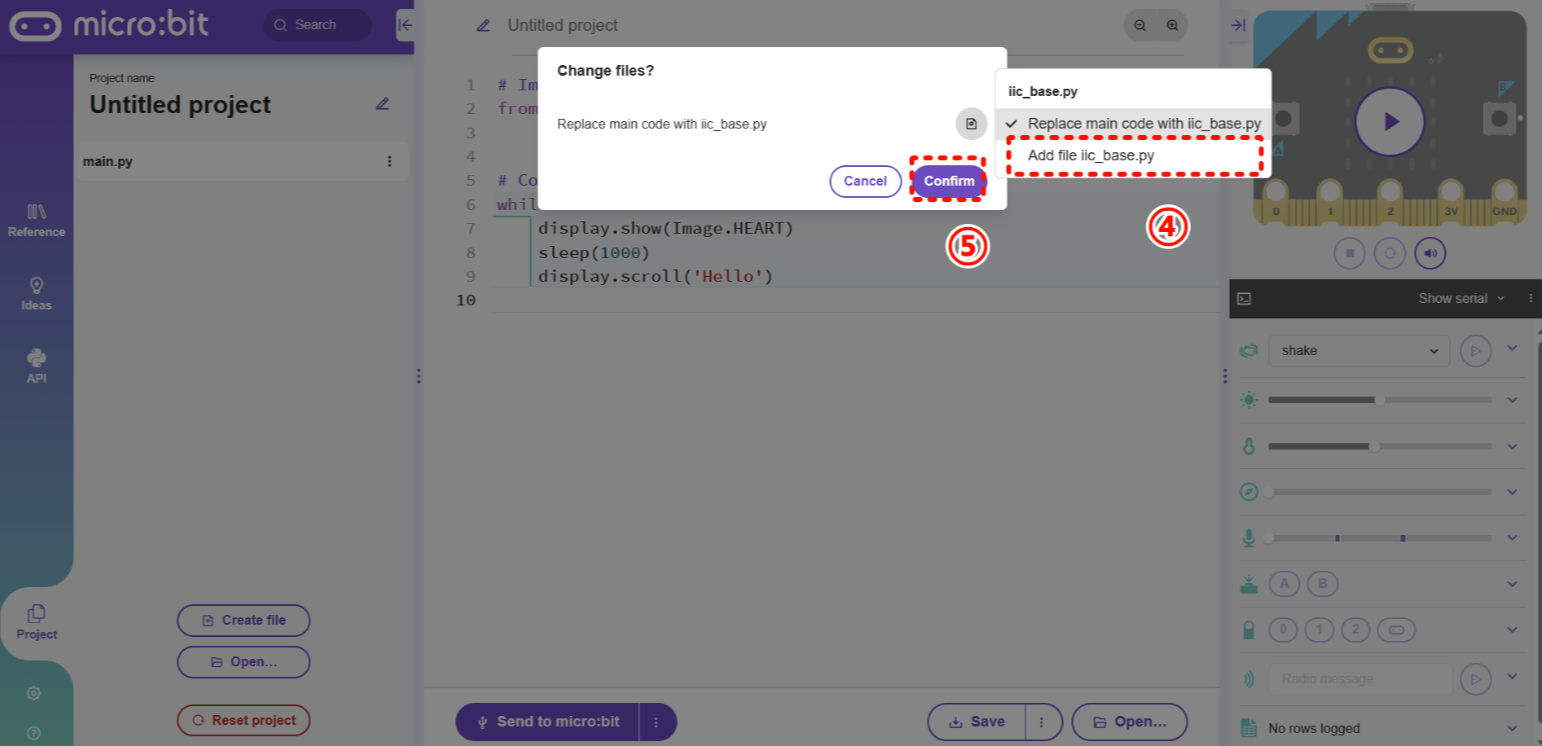
Step 3: In the pop-up dialog, select the second option, then click OK.
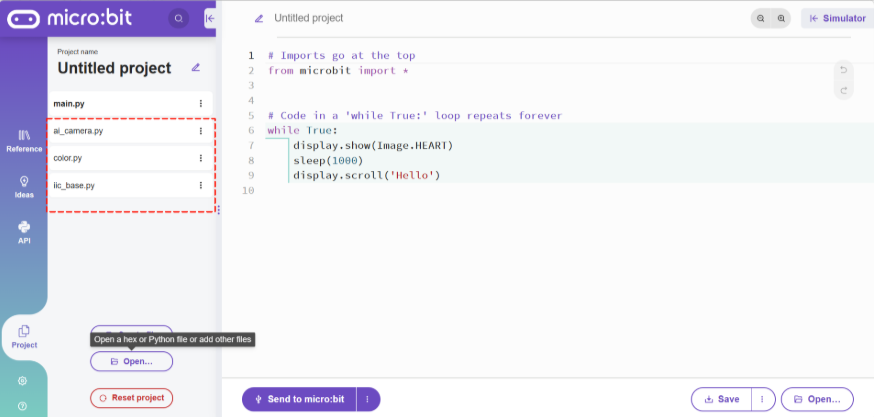
Step 4: The added files will appear in the left-side project panel, indicating that they have been successfully imported.
Hardware Preparation
Device Contents
|
|
|---|---|
ICreateRobot AI Vision Sensor |
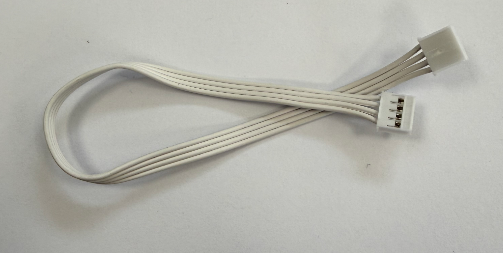
Grove Connection Cable |
|
|
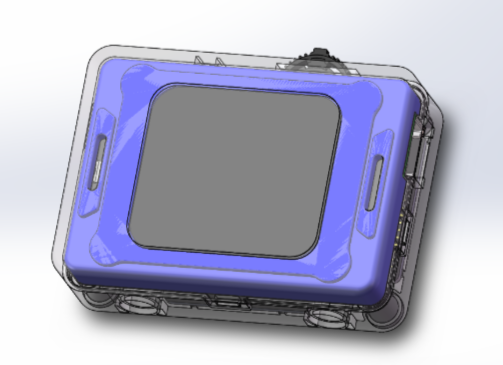
micro:bit Hub |
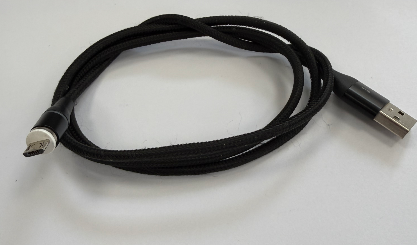
Micro-USB Connection Cable |

Device Operation
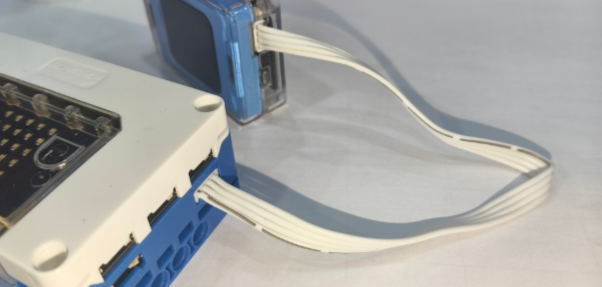
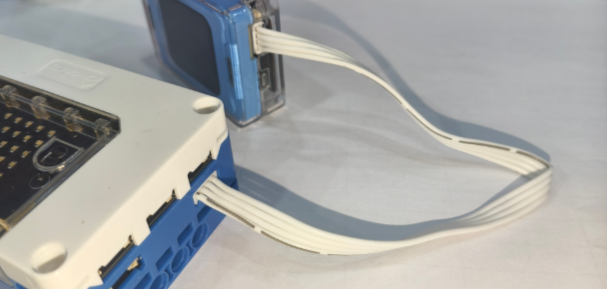
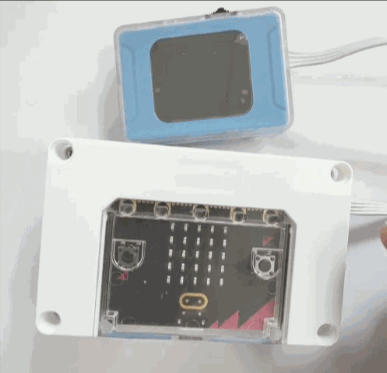
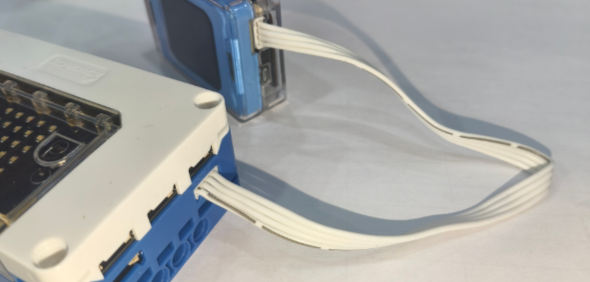
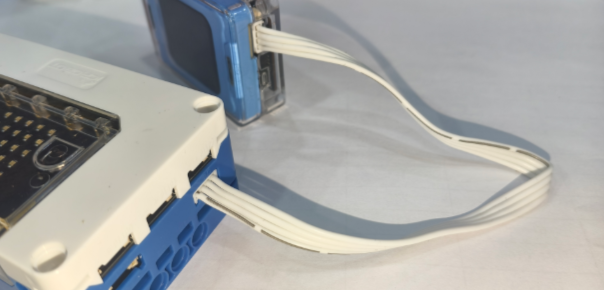
The AI Vision Sensor is connected to the micro:bit Hub via a Grove cable. The specific operation steps are as follows:
|
|
|---|---|
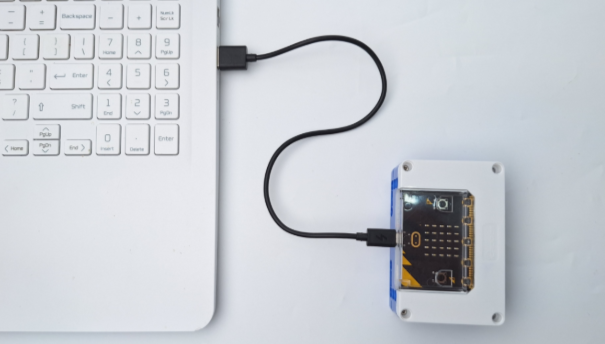
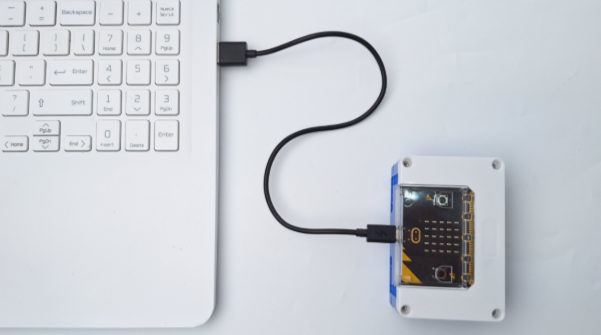
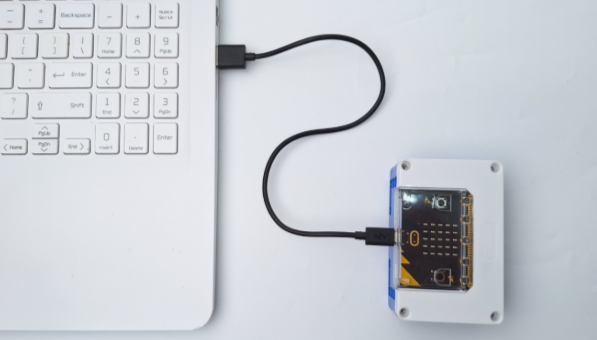
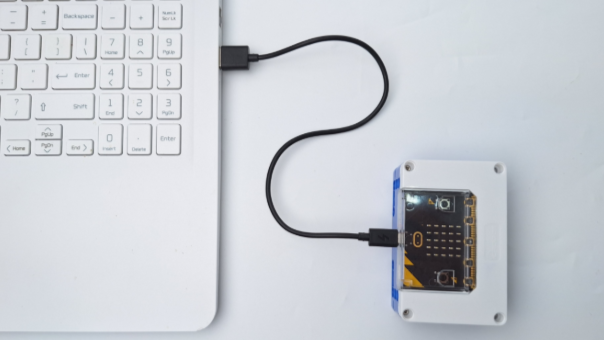
1. Use a Micro-USB cable to connect the micro:bit Hub to the computer. |
2. Connect one end of the Grove cable to any I²C port on the micro:bit Hub, and connect the other |
|
|
3. Press and hold the power button to turn on the micro:bit Hub. |
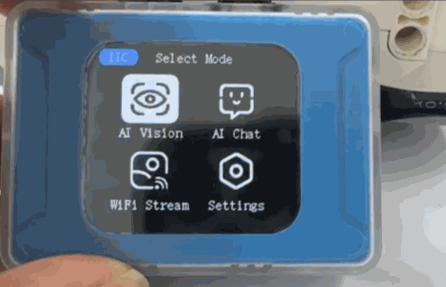
4. After the module powers on, rotate the dial to go to Settings and change the port protocol to I²C. |
Usage Examples
Example 1: Vision Mode – Label Recognition
Example Content:
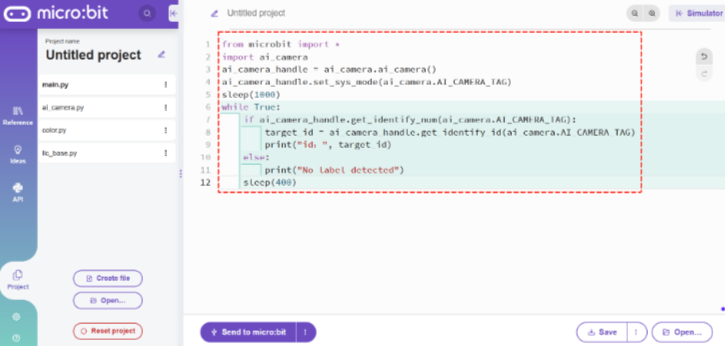
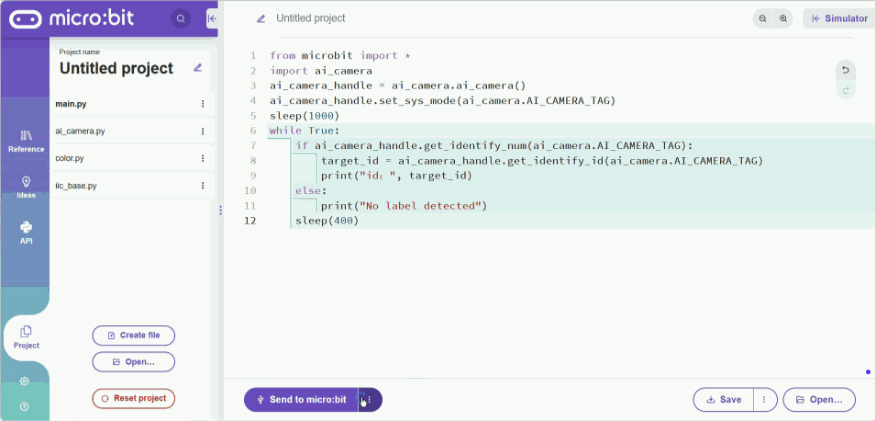
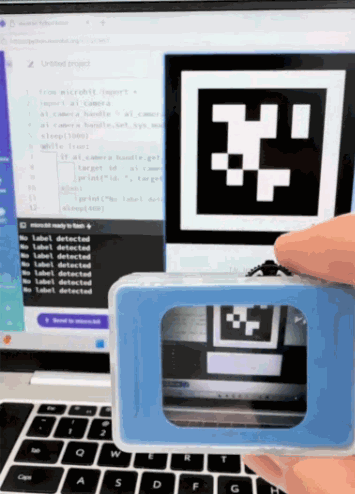
Connect the AI Vision Sensor to the micro:bit Hub and switch to Label Recognition in Vision Mode. If the vision module does not detect a label, the micro:bit serial output prints “No label detected”; otherwise, it prints the label ID.
Operation Steps:
|
|
|---|---|
1. Use a Micro-USB cable to connect the micro:bit Hub to the computer. |
2. Connect one end of the Grove cable to any I²C port on the micro:bit Hub, and connect the other end to the Grove port on the AI Vision Sensor. |
|
|
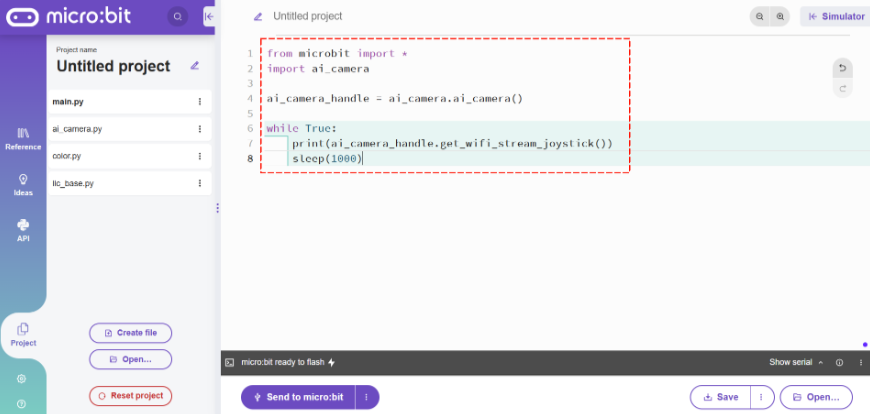
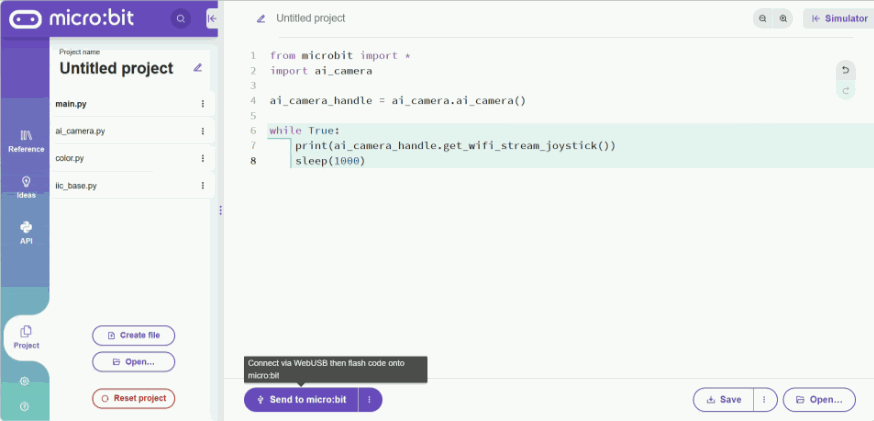
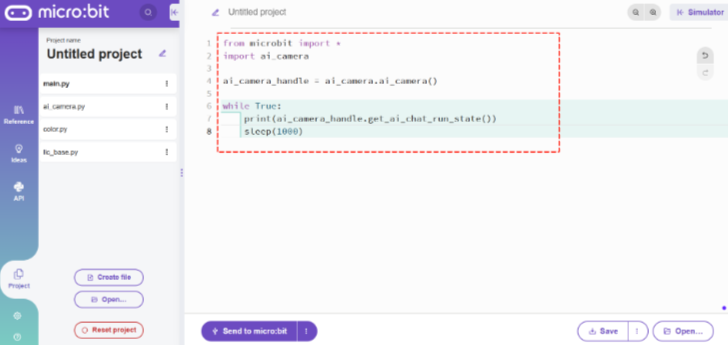
3. Copy the above code. |
4. Paste it into the code area of the online editor. |
|
|
5. Click the three-dot icon to the right of |
6. Press and hold the power button to turn on the micro:bit Hub.Select Vision Mode. |
|
|
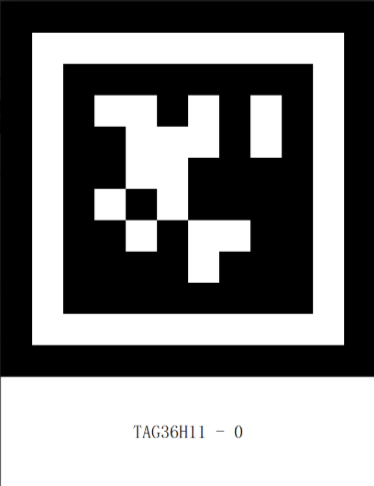
7. Prepare the labels. |
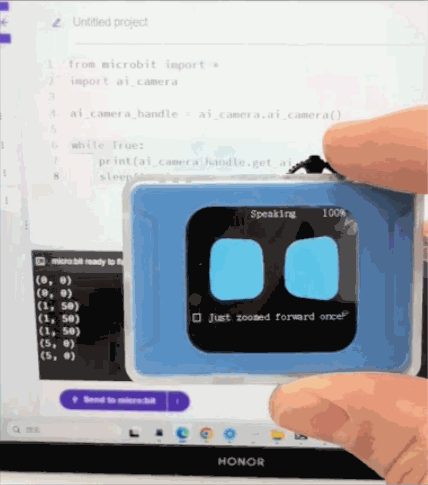
8. Execution Result: The serial output prints the label ID. |

Example 2: Conversation Mode – Voice-Controlled Movement
Example Content:
Connect the AI Vision Sensor to the micro:bit Hub and switch to Conversation Mode. The serial output prints the user’s voice input commands and speed information.
Operation Steps:
|
|
|---|---|
1. Use a Micro-USB cable to connect the micro:bit Hub to the computer. |
2. Connect one end of the Grove cable to any I²C port on the micro:bit Hub, and connect the other end to the Grove port on the AI Vision Sensor. |
|
|
3. Copy the above code. |
4. Paste it into the code area of the online editor. |
|
|
5. Click the three-dot icon to the right of |
6. Press and hold the power button to turn on the micro:bit Hub. Select Conversation Mode. For network configuration, refer to the Conversation Mode guide. |
|
|
7. Execution Result: The serial output prints the user’s voice input commands and speed information. |


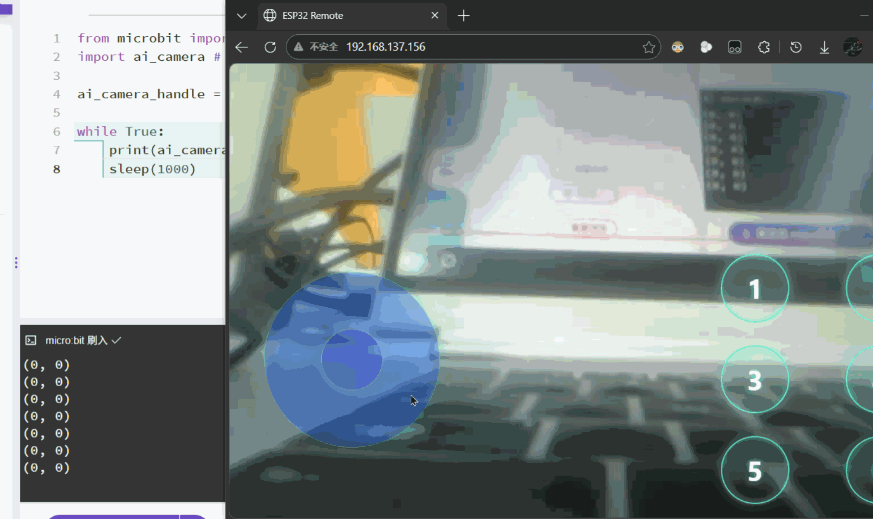
Example 3: WiFi Image Transmission – Web Joystick
Example Content:
Connect the AI Vision Sensor to the micro:bit Hub and switch to WiFi Image Transmission mode. The webpage displays the camera feed, and the serial output prints the joystick values.
Operation Steps:
|
|
|---|---|
1. Use a Micro-USB cable to connect the micro:bit Hub to the computer. |
2. Connect one end of the Grove cable to any I²C port on the micro:bit Hub, and connect the other end to the Grove port on the AI Vision Sensor. |
|
|
3. Copy the above code. |
4. Paste it into the code area of the online editor. |
|
|
5. Click the three-dot icon to the right of |
6. Press and hold the power button to turn on the micro:bit Hub. Select WiFi Image Transmission. For usage, refer to the WiFi Image Transmission guide. |
|
|
7. Execution Result: The webpage displays the camera feed, and the serial output prints the joystick values. |